vSphere 6.5 – How to Assign License Key to vCenter Server
Two Steps to Manage this Licensing for vCenter. Please note the same we can do for ESXi Hosts.
- Step#1 Add License Key to Virtual Center
- Step#2 Assign License to Virtual Center
Manage License Key for Virtual Center Server:-
Step#1 – Add License Key to Virtual Center
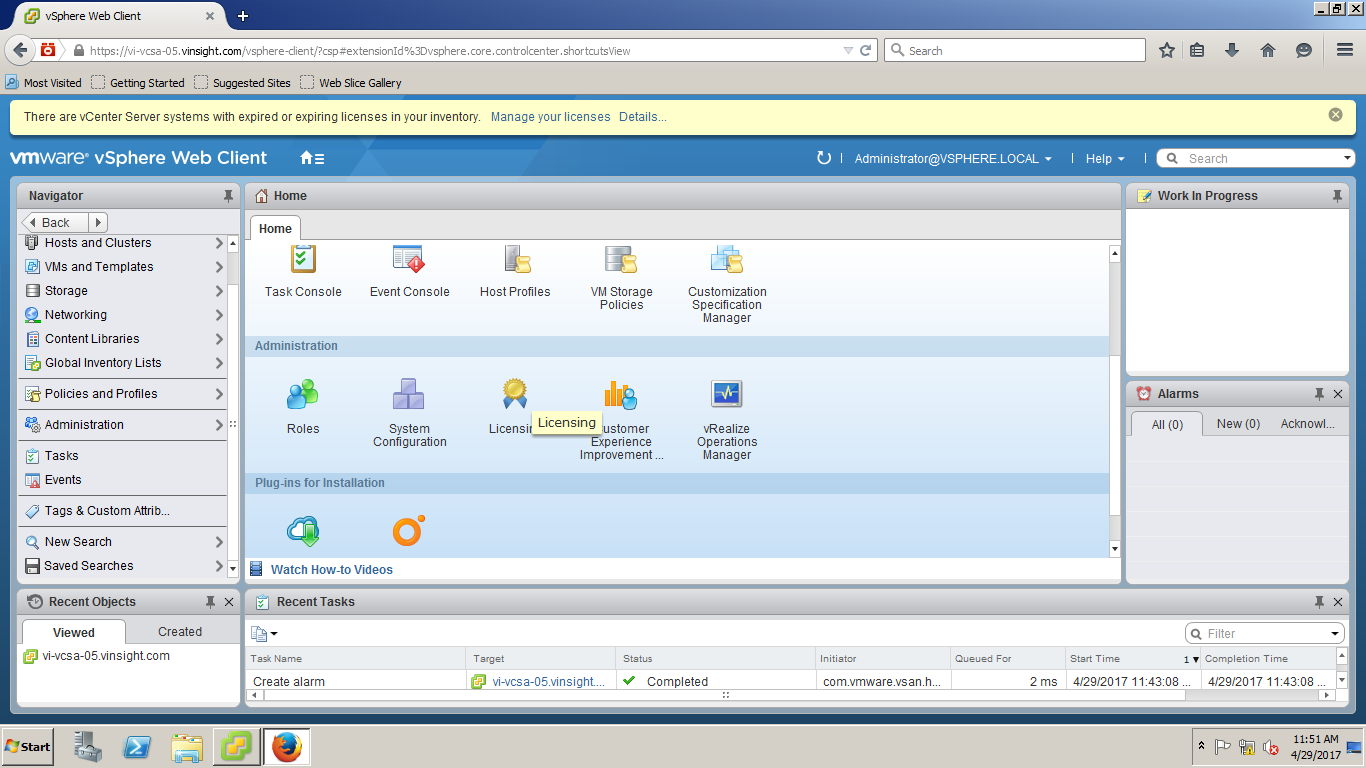
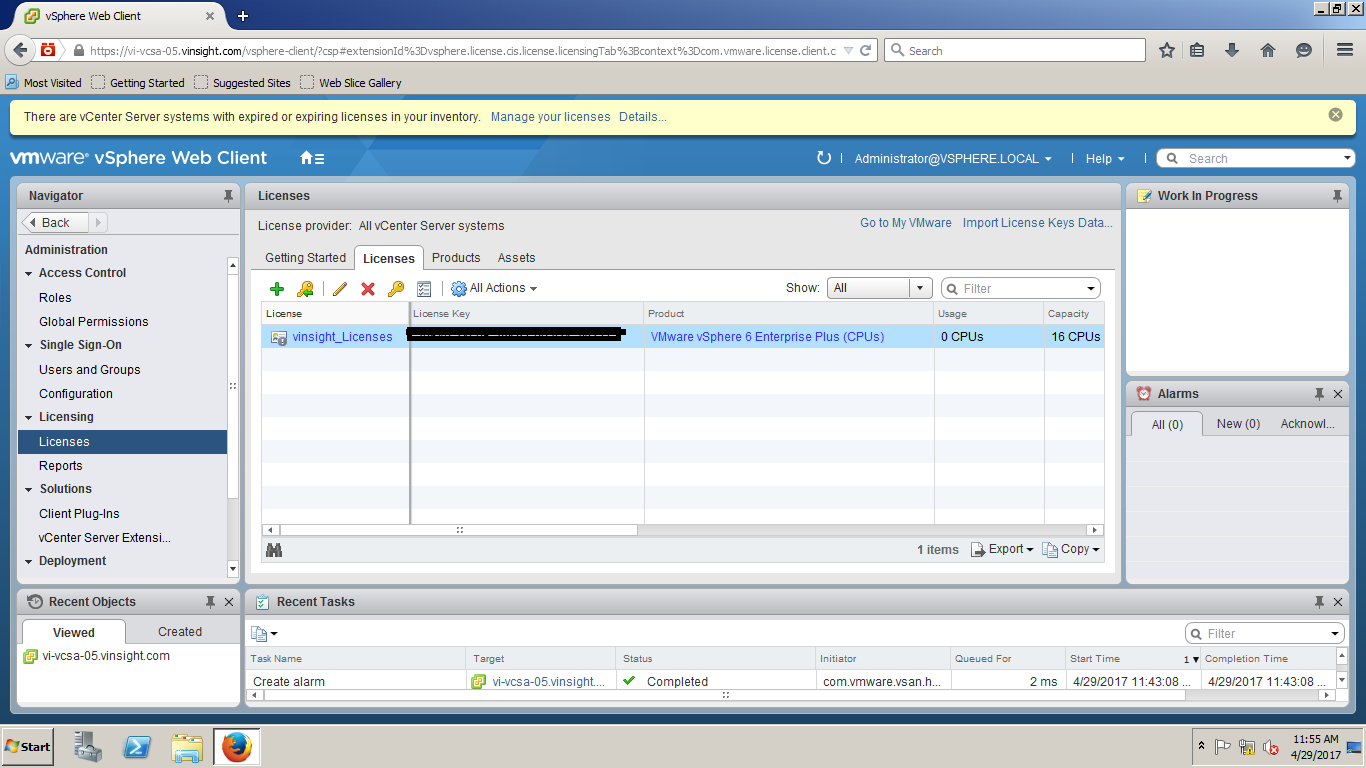
- Login to Virtual Center using Web or vSphere Client. Here we have logged in thrugh Web Client.
- On top of console, you can see the note saying that licenses in our inventory either expired or not available.
- Go to Home > Click on Licenses under Administration Tab
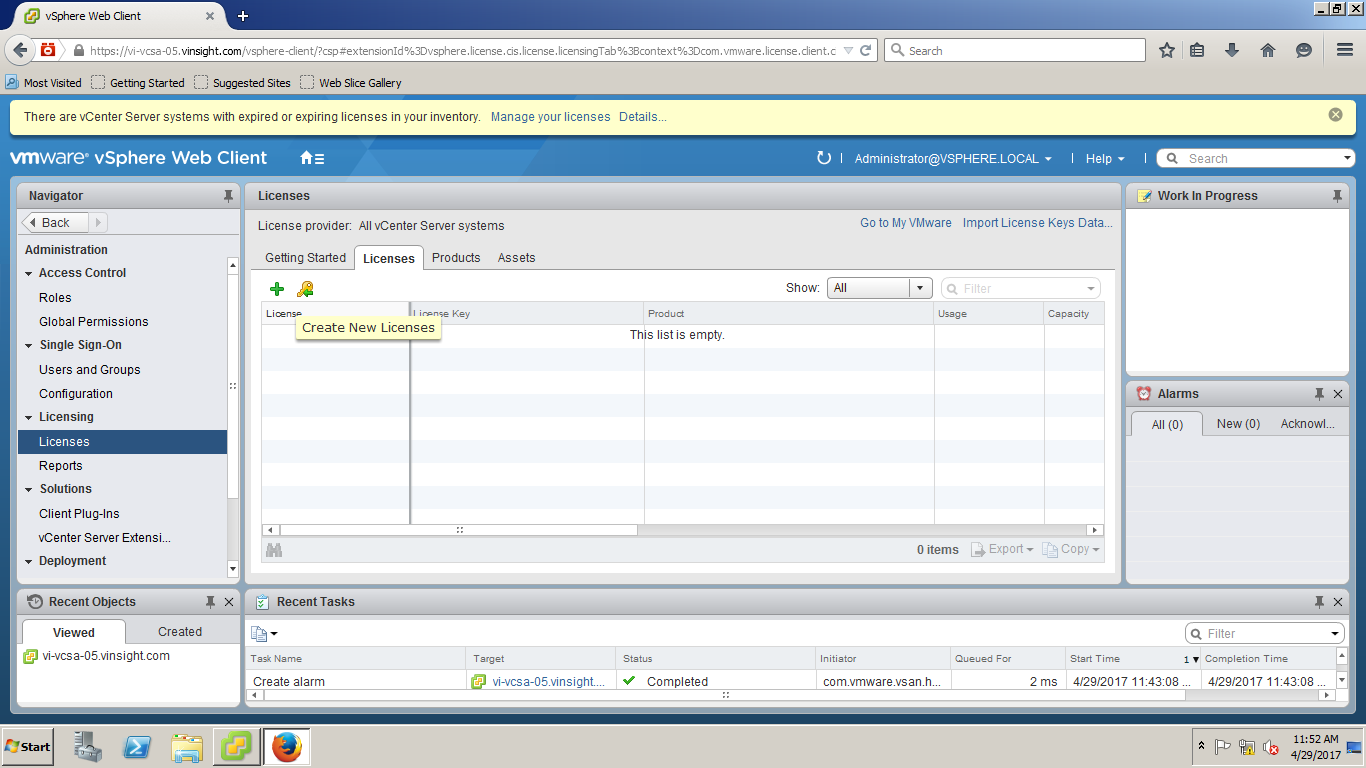
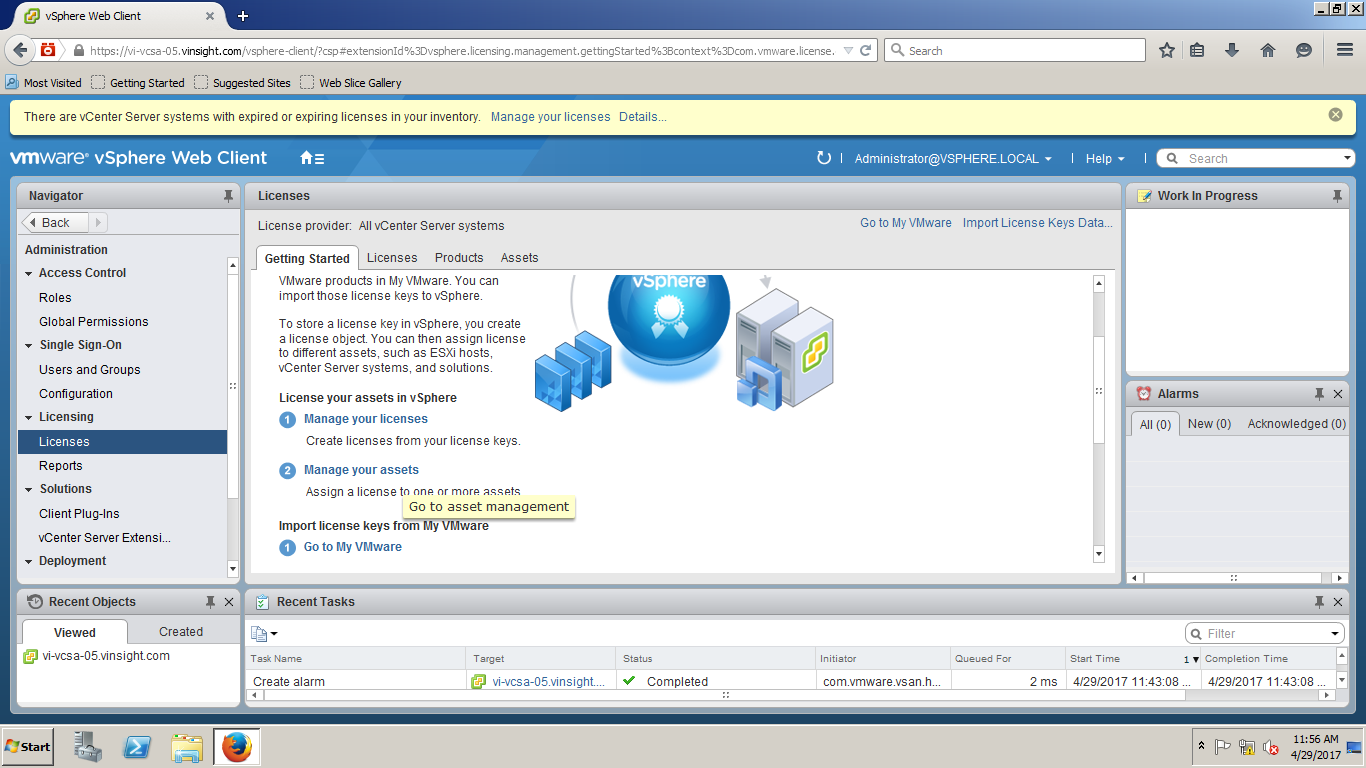
- Click on Manage your Licenses in Getting Started Tab or Go to Licenses Tab.
- Click on + icon to Create New Licenses.
- Enter the vCenter Server 6.x Standard license key and press Enter to add a new line.
- Enter the vSphere 6.x Standard license key(For ESXi), and click Next.
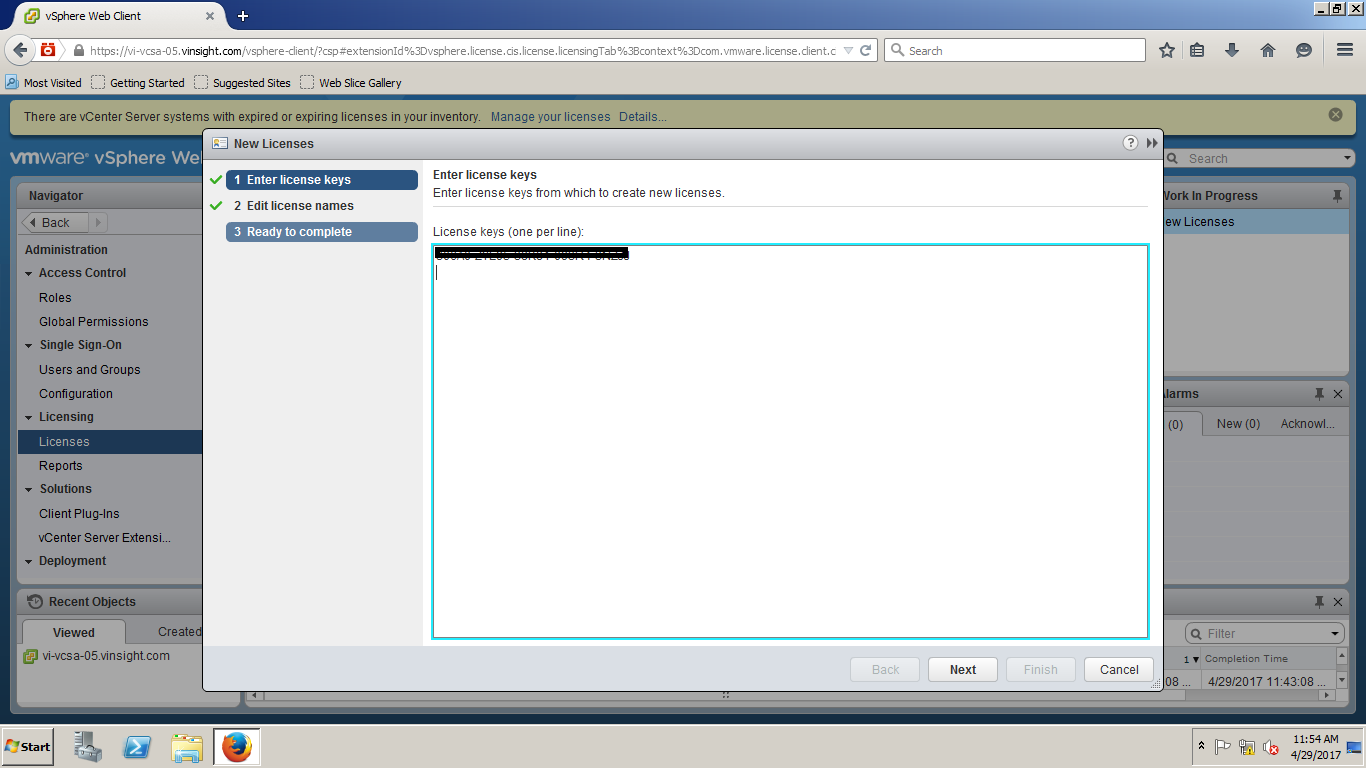
- Label the license keys as per your convinient. Click on Next.
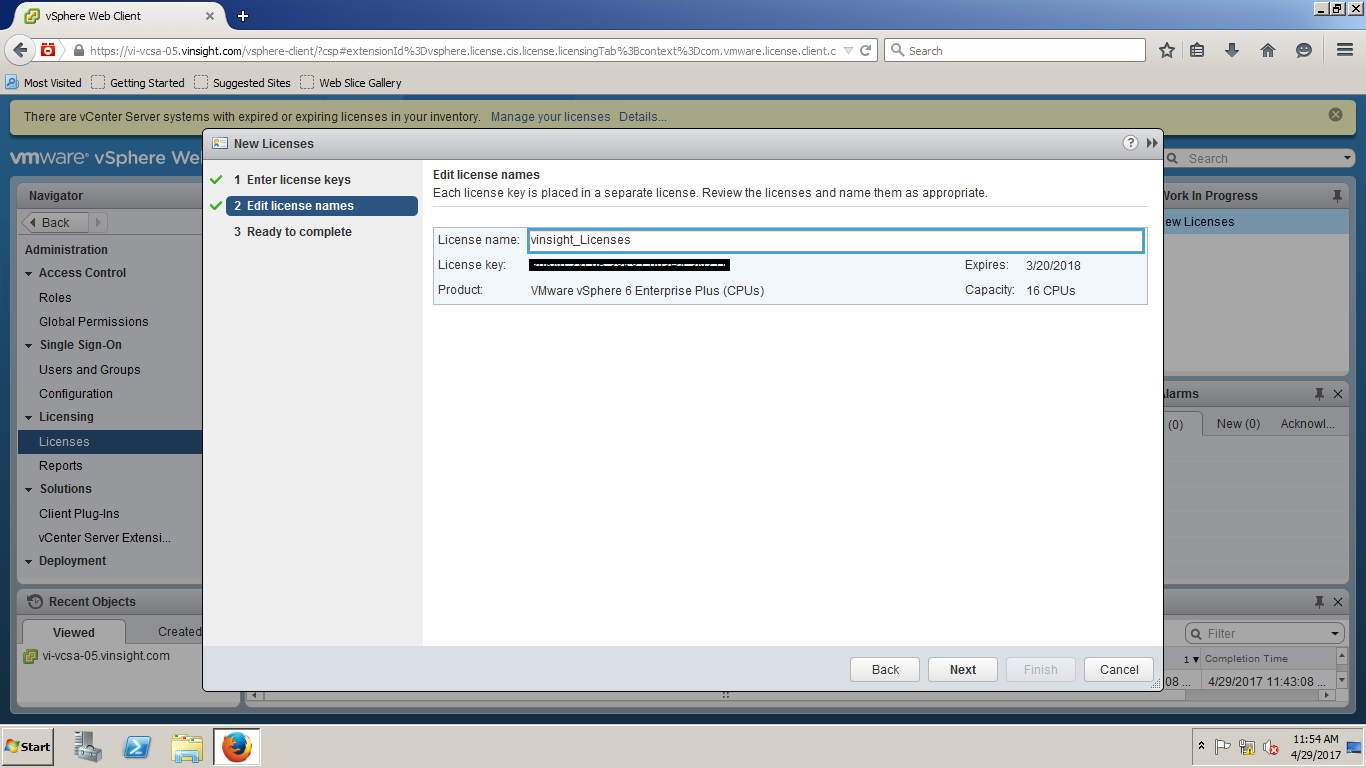
- Your Licenses have been added here. Now let’s move to Step#2 to Assign Licenses.
Step#2 – Assign License to Virtual Center
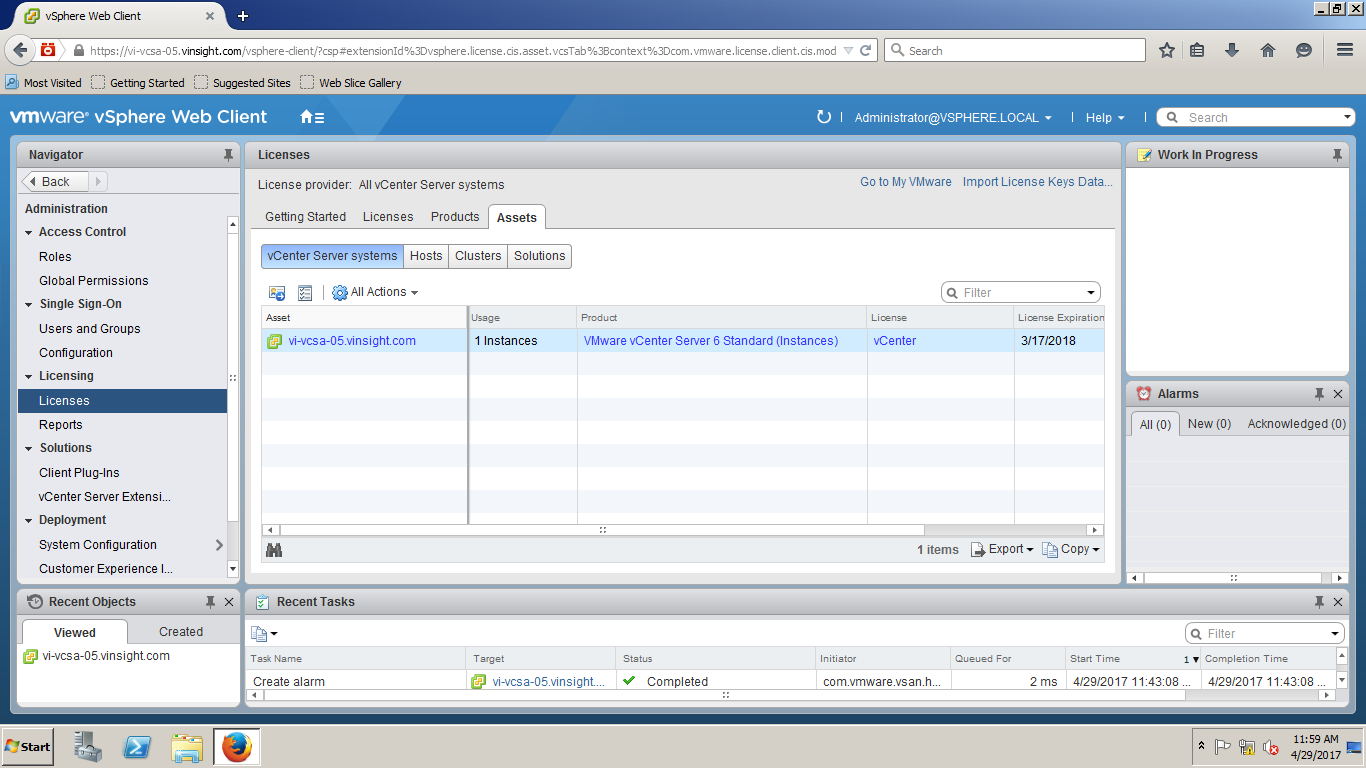
- Go to Licenses Option and and Click on Manage Your Assets under Getting Started tab. It will redirect you to Assets Tab.
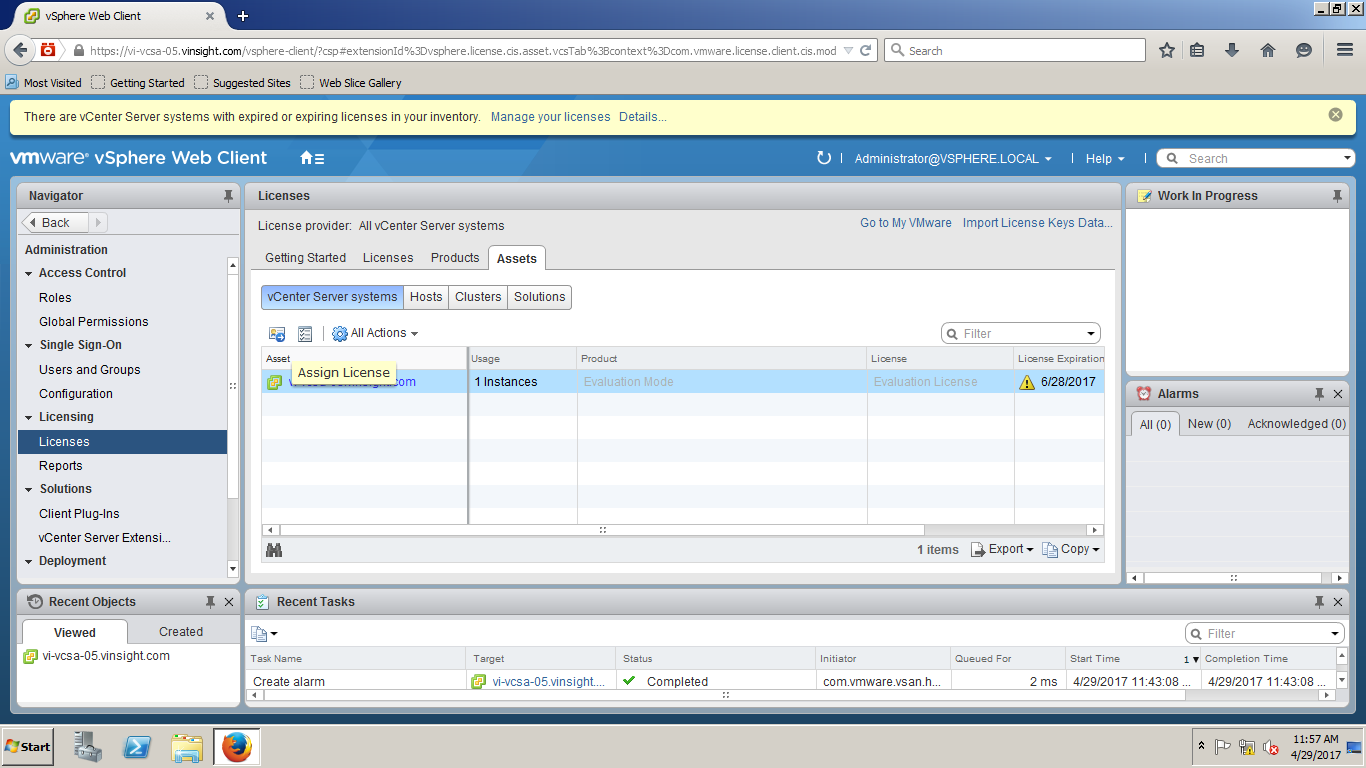
- Under Assets Tab > Go to vCenter Server Systems (To Assign License to Virtual Center). Do the same for ESXi Host in Hosts Tabif you want to assign License to ESXi Host.
- Click on Firts Icon -> to Assign License
- Select License and Click on OK.
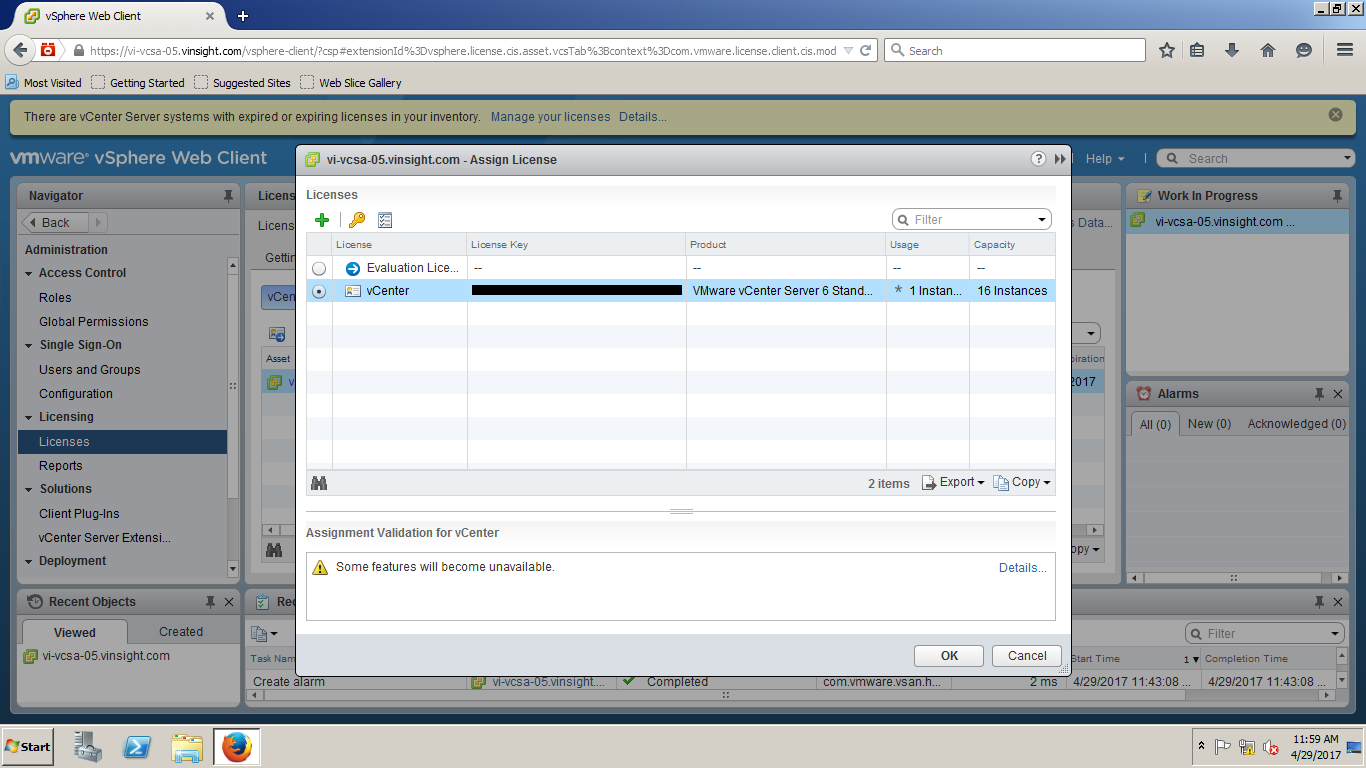
- vCenter Server is Licensed Now. Enjoy Managing the Inventory.
vSphere 6.5 – How to Assign License Key to vCenter Server